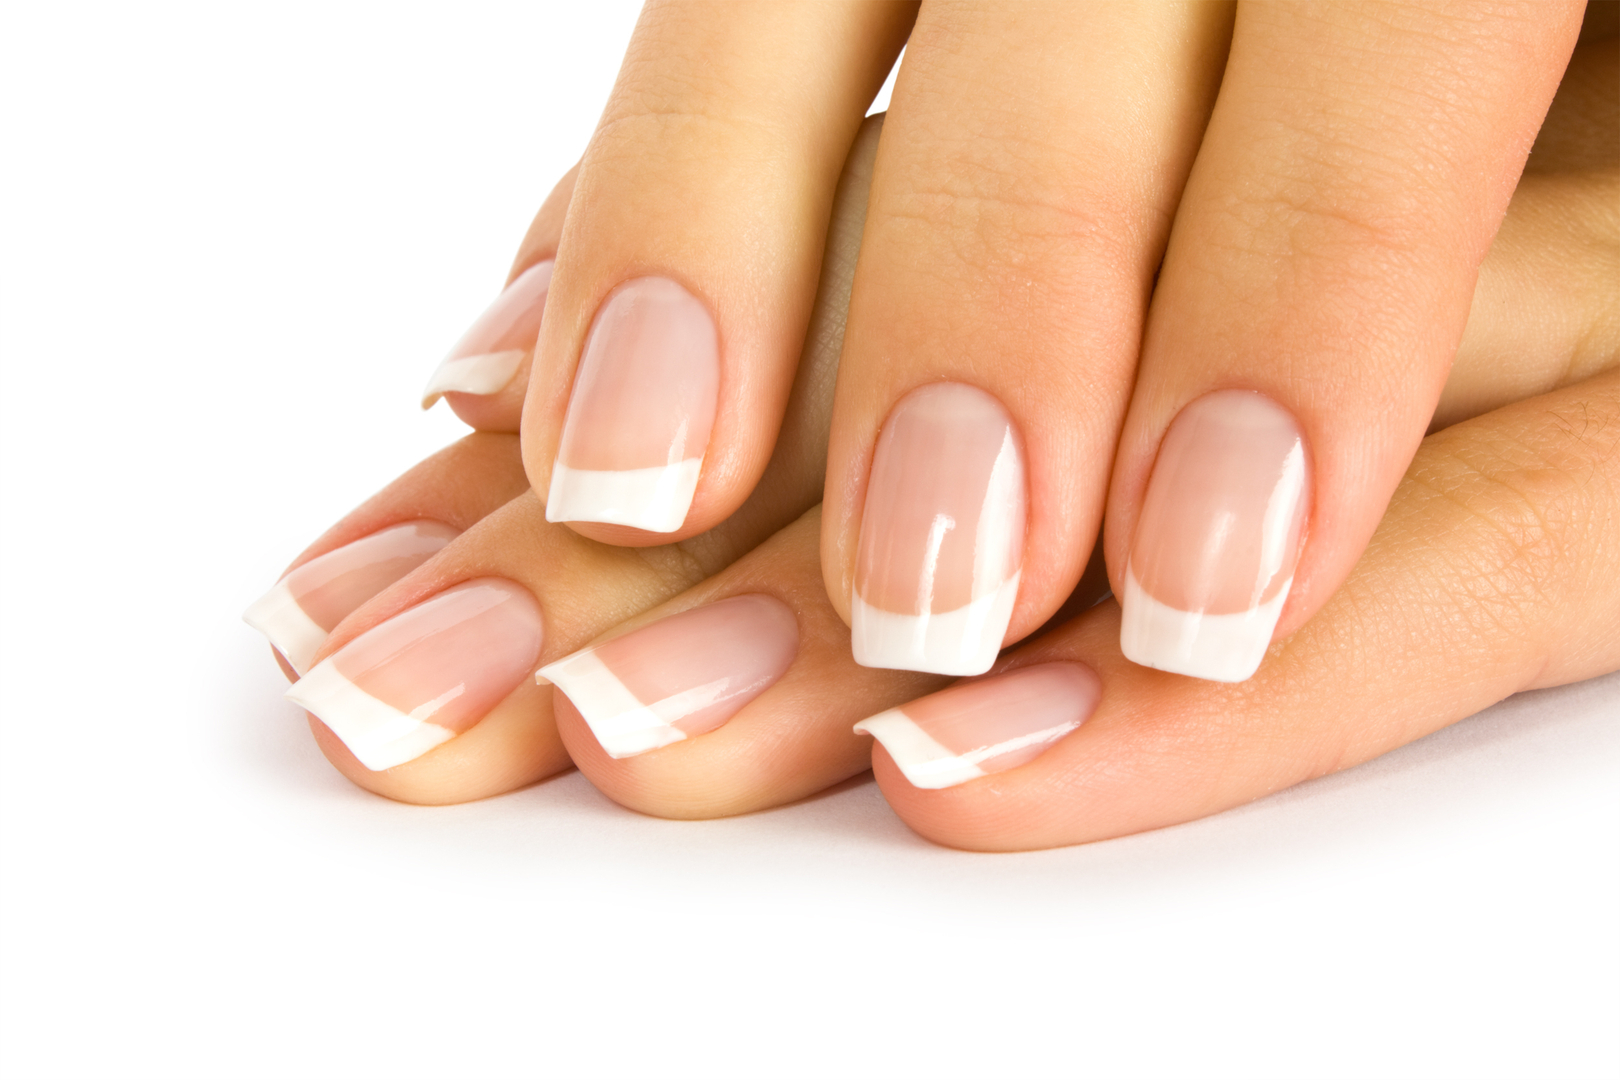
Natural Nail Manicure at Home: Step-by-Step Guide for Healthy Beautiful Nails
Learning how to do a professional-quality natural nail manicure at home is one of the easiest and most affordable ways to keep your hands looking beautiful, healthy, and clean without spending money at a salon. We tend to spend a lot of time and money on multi-step skincare routines and hair masks, but we completely forget about our hands. Between washing dishes, typing on keyboards, cleaning, and dealing with harsh weather, our natural nails take a beating.
The good news? You do not need a costly salon appointment to fix brittle, peeling tips. A simple, mindful 20-minute routine can completely transform your nail strength and give you that clean, high-shine look naturally.
This simple guide will show you exactly how to care for your hands using expert, step-by-step techniques.
Why Natural Nail Care Matters
Healthy nails are more than just attractive; they act as a protective shield for the sensitive tissues underneath your fingertips.
When you commit to a gentle weekly routine, you are doing more than making your hands look pretty. You are actively preventing painful splits, keeping hangnails away, and boosting blood flow to help your nails grow thicker and faster. Think of it as a weekly wellness routine for your hands.
The Home Manicure Tool Kit
Before getting started, clear off a flat surface and gather these basic tools. You do not need expensive, professional-grade equipment—just these simple basics:
| Essential Tool | What It Does | Why It Matters |
| Non-Acetone Remover | Cleans off old polish and surface oils. | Acetone strips away moisture. Non-acetone is much gentler on natural nails. |
| 180/240 Grit File | Shapes the edges of your nails. | Look for a file stamped 180/240 (crystal glass or emery board). Lower numbers are too rough and will shred natural nails. |
| Nail Clippers | Trims down extra length. | Keeps cuts clean. Always trim when nails are slightly soft. |
| Wood Cuticle Stick | Pushes back dead skin gently. | Avoid sharp metal scrapers, which can easily scratch and damage the nail. |
| Buffing Block | Smooths ridges and adds shine. | The secret to a glossy, healthy look without needing clear polish. |
| Cuticle Oil or Jojoba Oil | Deeply hydrates the skin and nail. | Gives the nail plate flexibility so it bends under pressure instead of snapping. |
| Rich Hand Cream | Locks in total moisture. | Creates a protective layer to keep your hands and nails from drying out. |
Knowing Your Nail Anatomy: Safely Avoiding Pain
To avoid pain and infection, you must know the difference between the skin you can safely push back and the living skin you must never cut.
- The Cuticle: This is the dry, dead, flaky white tissue sitting directly on the nail plate. It is safe to gently push back and wipe away.
- The Eponychium: This is the living, fleshy skin fold at the very base of your nail. Never cut or forcefully push this skin. It protects your nail root from bacteria. Cutting it causes redness, swelling, and bumpy nail growth.
Step-by-Step Natural Nail Manicure at Home
The Golden Rule of Manicures: Never file or buff your nails while they are wet or freshly soaked. Water expands the nail layers, making them soft and fragile. Filing wet nails causes immediate splitting and peeling. Always shape your nails while they are dry, before the soak.
Step 1: Clear the Surface
Start with completely bare, dry hands. Soak a cotton pad in non-acetone remover, press it firmly against the nail for five seconds, and then wipe. This dissolves old polish easily without rough scrubbing. Ensuring the nail is clean and free of oils helps the tools work perfectly.
Step 2: Trim and File (Dry)
If your nails are longer than you want, use sharp clippers to take down the extra length first. Next, grab your 180/240 grit file. Choose a shape that matches the curve of your cuticles—oval, round, or a soft square (squoval) are the strongest shapes.
Always file in one single direction. Do not saw the file back and forth. Sawing creates tiny frays in the nail wall that will turn into major splits later.
Step 3: Buff for a Natural Shine (Dry)
Take your fine buffing block to gently smooth out vertical ridges. To do this perfectly, hold your hand under a desk lamp and look for the reflection of light on your nail. If the line of light looks bent, you have a ridge. Lightly stroke across that spot until the line of light looks straight.
Keep the pressure light. Over-buffing thins out your nail plate. Buffing once every two to three weeks is plenty.
Step 4: The Hydration Soak
Now that the dry shaping is finished, it is time to soak. Fill a small bowl with warm water or warm milk. Soak your fingertips for five to seven minutes. Warm milk contains lactic acid, which acts as a gentle, natural softener for rough skin around the fingers. This step relaxes your hands and prepares the cuticles for detail work. Pat dry thoroughly with a towel.
Step 5: Push Back Your Cuticles
Take your wooden cuticle stick and gently push the softened, dead cuticle tissue back toward the base of the nail. Remember, do not press hard against the living skin wall. Only use a pair of cuticle nippers to carefully snip away loose, dead hangnails that are actively catching on your clothes. Leave everything else alone.
Step 6: Lock in the Moisture
Apply a drop of cuticle oil or pure jojoba oil directly to each nail bed. Massage it into the skin, sides, and tips to boost blood flow. Finish by applying a rich hand cream over your entire hand. This seals the oil and water into the skin barrier, leaving your hands feeling soft and refreshed.
Bonus: The “Clean Girl” Aesthetic Option
If you want a polished look but do not want completely bare nails, skip heavy, thick colored polishes. They show mistakes easily and are hard to apply cleanly at home. Instead, apply a single coat of a sheer, translucent pink or milky white polish. These tones dry incredibly fast, hide imperfections, and give your hands an instant, high-end salon finish.
Emergency Troubleshooting Guide
If something goes wrong during your routine, use this quick guide to fix it safely:
| The Problem | Why It Happened | The Quick Fix |
| The skin starts bleeding | You cut or pushed the living skin fold instead of dead cuticle tissue. | Wash the area with cold water, apply a drop of hydrogen peroxide, and press firmly with a clean tissue for 60 seconds. Do not apply oil or cream to an open cut. |
| White spots appear after buffing | You buffed too hard or too fast, creating heat friction that separated the nail layers. | Stop buffing entirely for a month. Rub warm olive oil onto the nail daily to deeply hydrate the damaged layers. |
| The nail edge feels rough/ragged | You used a rough file or used a sawing motion. | Take a fine glass file, tilt it at a 45-degree angle underneath the nail tip, and stroke lightly upward in a single direction to cleanly clear away the frayed debris. |
Common Manicure Mistakes to Avoid
- Using Nails as Tools: Using your nails to peel off labels or open soda cans forces them to bend under pressure, causing fractures across the nail bed.
- Skipping Gloves in the Kitchen: Leaving your hands unprotected while using dish soap or cleaning chemicals strips the natural oils right out of your nails, causing immediate dryness and chipping.
- Peeling Off Old Polish: Picking or scraping off old nail polish tears away the top protective layer of your nail plate, leaving it weak and thin.
The Pro-Grade Maintenance Schedule
Nail health is built on small daily habits rather than a single monthly fix. For the best results, stick to this simple routine:
- Daily: Apply cuticle oil to your nail beds right before bed.
- 2–3 Times Daily: Apply a moisturizing hand cream, especially after washing your hands.
- Weekly: Dedicate 20 minutes to a full, gentle home manicure.
When to See a Professional
Most brittle or dry nails are simply caused by daily chores and water exposure. However, your nails are also great indicators of your overall internal health. If you notice persistent changes that do not get better with moisturizing—such as deep horizontal ridges, distinct yellow discoloration, nails lifting away from the bed, or unexplained dark vertical streaks—it is always a smart idea to get evaluated by a healthcare professional or dermatologist.
Frequently Asked Questions
Can I get a shiny look without clear nail polish?
Absolutely. A quality buffing block can buff the natural oils of the nail to a glassy, high-gloss shine that lasts for days, entirely eliminating the need for chemicals or drying base coats.
What is the absolute best oil for cuticles?
Pure jojoba oil is arguably the most effective option because its molecular structure closely mimics human sebum. This allows it to actually penetrate the dense layers of the nail plate, whereas heavier oils often just sit on top.
Why do my natural nails keep peeling in layers at the tips?
This is usually caused by chronic water exposure (like doing dishes without gloves) or filing back and forth with a rough metal file. Shifting your filing technique and protecting your hands from soaking in water will fix this within a few growth cycles.
How fast do natural nails actually grow?
On average, fingernails grow about 3.5 millimeters per month. Because growth happens from the root forward, it takes roughly six months to completely replace a nail from base to tip. Patience and consistent moisturizing are your best friends here.
Final Words
Taking the time to do a thorough natural nail manicure at home is the perfect way to build an affordable, healthy self-care routine. The real secret to beautiful hands isn’t expensive luxury products or complex pro-level secrets; it is simply consistency, correct filing habits, and deep hydration. Spend just 20 minutes a week following these steps, and you will quickly notice smoother, stronger, and completely restored nails that look naturally stunning every day.