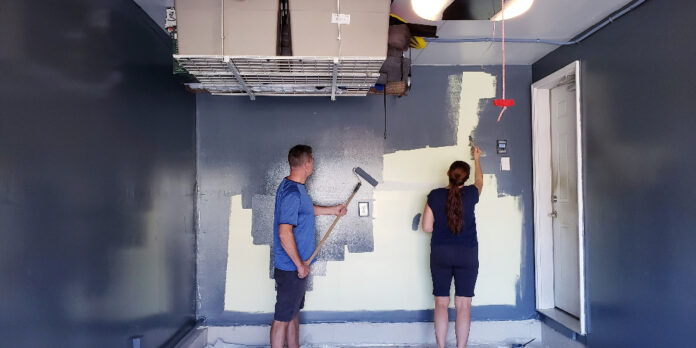
Painting your garage walls can improve the appearance of your home and add customization for you to express your personality. But before you get started, it’s important to prep the garage walls properly.
This will ensure the paint job adheres and lasts. Here’s how to do it. This includes removing hardware, masking areas you don’t want to paint, and providing proper ventilation.
Remove All Debris
Paint stored in a garage can lose consistency and create issues when used. It’s best to start afresh with a new color that is well-ventilated and properly formulated for the job.
If you’re planning to re-paint the garage floor, it is recommended to lay down a drop cloth or plastic sheeting to protect surfaces you don’t want to get paint on. It’s also a good idea to wear a mask to avoid breathing in fumes and gloves graded for paint use. Hiring garage painting services to ensure a good output is still best.
The next step is to clean the entire garage. This will require thoroughly sweeping and vacuuming all surfaces, starting with high shelves and workbench areas and working your way down to the floor. Make sure to remove any dust, debris and sanding residue. At this stage, it’s also a good idea to sort your items into keepers, donate/sell and discard piles.
Prime the Surface
A fresh coat of paint makes the garage look new and can help regulate temperature by creating an insulating barrier or dispersing heat. However, a few key factors should be considered before applying any materials.
Whether using drywall or concrete paint, you’ll likely need to prime the surface first. This prevents the paint from soaking into the drywall and stops future stains from occurring.
It’s also helpful if you are painting over a darker color since high-build primers are known to hide stains. Once you’ve applied your primer, allow it to dry for a day or two before you start painting.
If you’re using a roller, use long horizontal strokes to help control the amount of paint drip. If you’re using a brush, you can use an angled brush to “cut in” the edges around doors and windows and any built-ins or fixtures.
Sand the Surface
If the garage already has some paint, the new coat of paint will need to be sanded. This helps create a smoother surface and allows the primer and finish to adhere well. During this step, wear a face mask and eye goggles to protect against the dust and chemicals.
Once the walls have been sanded, wash them with trisodium phosphate (TSP) solution to clean off any accumulated dirt and grime. This will help to prepare the walls for painting and also remove any grease stains that may be present.
If the floor is to be painted, it should first be cleaned using a power washer and then etched with a commercial concrete etcher. This will roughen the floor and allow the concrete to absorb the finish better. Once the floor is dry, sand it again with a fine-grit sandpaper.
Clean the Surface
Painting your garage may seem like a small task, but it can make a big difference in the look of your home and can increase its value. A fresh coat of paint can also protect your belongings from abrasion, impact, extreme heat or cold, moisture, mold, and even insects.
Start by using a broom and vacuum to remove any debris. Then, clean the surface with a sponge and warm, soapy water. This will eliminate dirt and grime built up over time and prevent the paint from adhering to the surface.
Before you begin painting, make sure the garage is well-ventilated. This will help to prevent inhaling paint fumes, which are toxic if inhaled over long periods. It’s also a good idea to wear a mask while working. This will ensure you don’t accidentally inhale any dust or debris that may have landed on the walls during your cleaning process.
Apply the Base Coat
You can choose between various paints, but latex is your best option for garage walls. It is less toxic than oil-based paint, dries quickly, and provides a wipe-clean surface. If you want a tough finish, consider a resin or epoxy coating. You can find these at your local hardware store, but follow the manufacturer’s instructions for application.
A few coats of paint can transform a neglected space into one you’ll be proud to show guests. The bare walls of the garage often make the room seem unfinished and cluttered, but a quick paint job can change that. Remember to clean the floor before painting and use good quality masonry paint to stand up to foot traffic. And always work in a well-ventilated area, opening windows where possible and using fans to circulate air.
Apply the Top Coat
A fresh coat of paint can transform your garage into a clean and functional space. The right tools, materials and step-by-step painting instructions will help you achieve a professional finish.
After all the hard work, you can relax and enjoy your newly painted garage!
Before you start painting, remove any hardware or other objects that won’t be covered. This will help you avoid mistakes and ensure that no areas are missed.
Cover any areas you don’t want to be painted with masking tape and plastic sheeting. This will save you time and money in the long run. It is also important to wear a face mask and gloves that are graded for use with paint. This will prevent you from inhaling or contacting chemicals that could cause short-term problems such as coughing and dizziness or long-term health issues like respiratory diseases, cancer, and liver damage.
Recommendation
5 Super Cute Boho Peel and Stick Wallpapers Thatare Trendy For 2024
How To Apply Peel And Stick Wallpaper? Complete Guide


