

Peel-and-stick wallpaper is an easy and affordable way to update the look of your walls. Its self-adhesive backing eliminates the need for messy paste, and if you make a mistake, you can peel it off and start over. However, proper preparation and using a few tools and techniques will ensure that your wallpaper adheres well and looks smooth and bubble-free. Follow these steps to learn how to apply peel and stick wallpaper.
How to Hang Peel and Stick Wallpaper
Keep in mind that peel-and-stick wallpaper is best suited for walls with a smooth texture and an eggshell, satin, or semi-gloss finish. It’s important to check the manufacturer’s instructions to make sure the wallpaper will properly adhere to your wall type.
To ensure that you purchase enough wallpaper for your project, carefully measure the area you plan to cover. Buy slightly more wallpaper than you think you’ll need in case of mistakes or to accommodate difficult areas such as windows, doors, or tight corners.
Things You’ll Need
| MATERIALS | TOOLS |
| Peel and Stick Wallpaper | Measuring Tape |
| Sticky Notes | Knife |
| Wallpaper Smoother | |
| Pin | |
| Level | |
| Scissor | |
| Step Stool or Ladder |
Step By Step Instructions
Before you begin hanging your wallpaper, it’s important to prepare the room, size the paper, and plan the layout. Once you’ve completed these steps, you can apply the wallpaper to your walls.
Keep in Mind:
Peel-and-stick wallpaper may not be suitable for all surfaces. Before purchasing, check the product information to ensure it will work with your walls. If you want to remove the wallpaper in the future, it’s important to choose a product that can be easily removed without damaging the walls or leaving residue.
PROCESS INSTRUCTIONS:
Clean and prepare The Wall
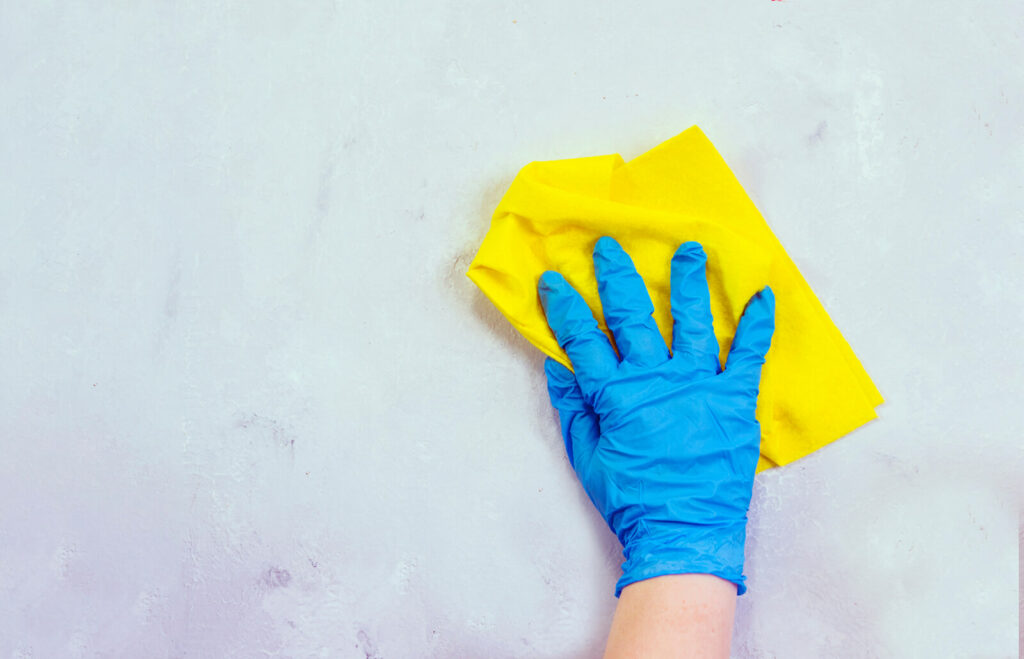
Before starting, it’s important to clean your walls with water and rubbing alcohol. This will help remove dirt, grime, and grease to ensure applying the peel and stick wallpaper gets easier & smoother.
Pro Tip: Install a Carpet that match your wallpaper to enhance the decor.
Decide Where to Start From
Once your walls are clean, you’ll need to determine your starting point. It’s best to find a straight, vertical line from ceiling to floor to reference hand peel and stick wallpaper.
If your walls are level, you can start from one end and work your way to the other. However, if your walls are not level or plumb, it’s a good idea to choose a mid-wall starting point and use a level to draw a straight line in pencil as a reference.
PRO TIP: An alternative to vertical installation is to apply self-adhesive wallpaper horizontally. To do this, draw your level starting line horizontally across the wall, dividing it into two halves. Then follow the steps below to complete the installation.
Measure the Walls
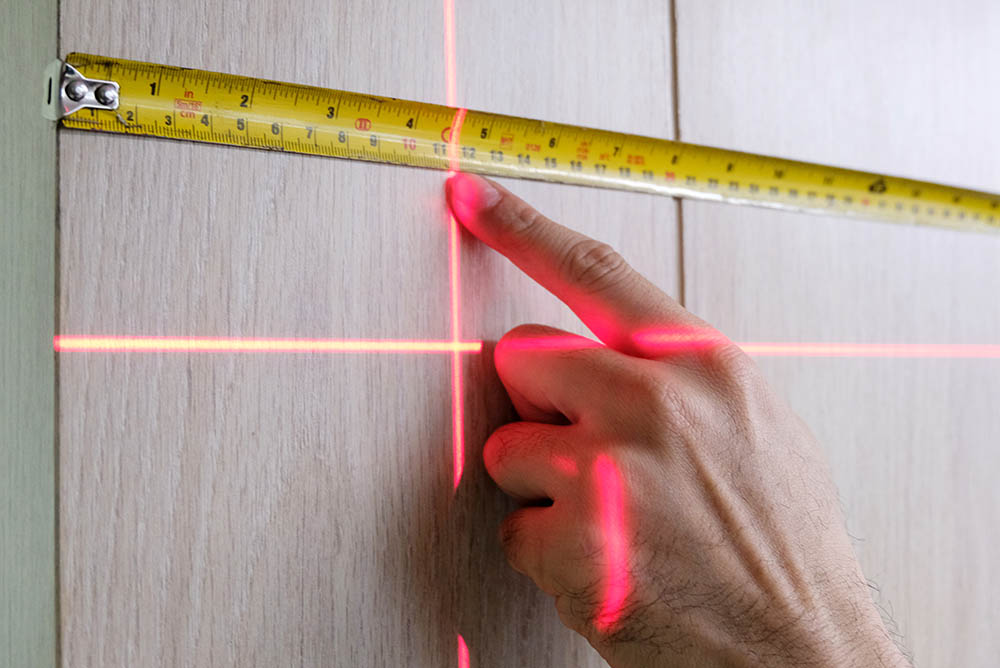
Before beginning, measure the height and width of your walls, and finding a space in your home or garage with a comparable floor area is good. This will give you a place to lay out your wallpaper cuts and patterns before adhering them to the walls.
Unroll the Peel and Stick Wallpaper
Before attempting to apply the peel and stick wallpaper, unroll it and reverse the roll to help it become more manageable. This will help flatten the paper, making it easier to work with.
Measure and Cut the First Piece
For the first piece of wallpaper, leave a 1.5-2 inch overhang at each end of the paper.
The wall in our project is 104 inches tall, so we will cut the wallpaper to 108 inches to allow for easier pattern matching and ensure the first piece can be firmly pressed into the seams for a clean edge.
Be sure to label this first piece with a sticky note for reference.
Measure and Cut The Rest of the Pieces
To cut the next pieces of wallpaper, use the first piece as a guide and make sure the pattern is properly aligned.
Cutting the second piece longer than the first may be necessary to ensure the patterns match up correctly. When measuring and cutting the next pieces, ensure that everything is aligned properly.
Arrange the Pieces on The Floor
After cutting the pieces of wallpaper, place them on the floor in the order they will be hung and label them accordingly.
This will give you a clear visual of the order in which the wallpaper pieces should be hung and ensure that you have a designated spot for each piece.
When you’re finished, you should have a collection of labeled and ordered wallpaper cuts ready for installation.
Place the First Piece on The Wall
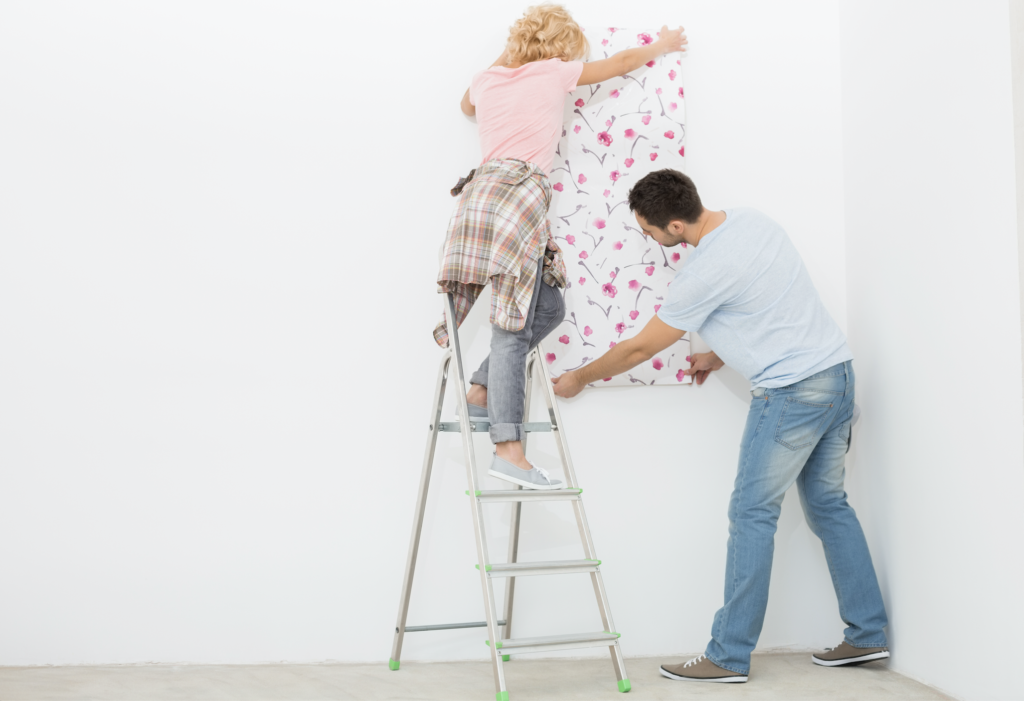
Now that you have a plan, it’s time to start installing the wallpaper. Begin with the first piece and carefully remove part of the backing.
Align the edge of the wallpaper with the starting line or wall, making sure to account for the overhang, and press the top section firmly into place. Make sure to follow your plan and install the pieces in the designated order.
Time to Hang The First Piece of The Wallpaper
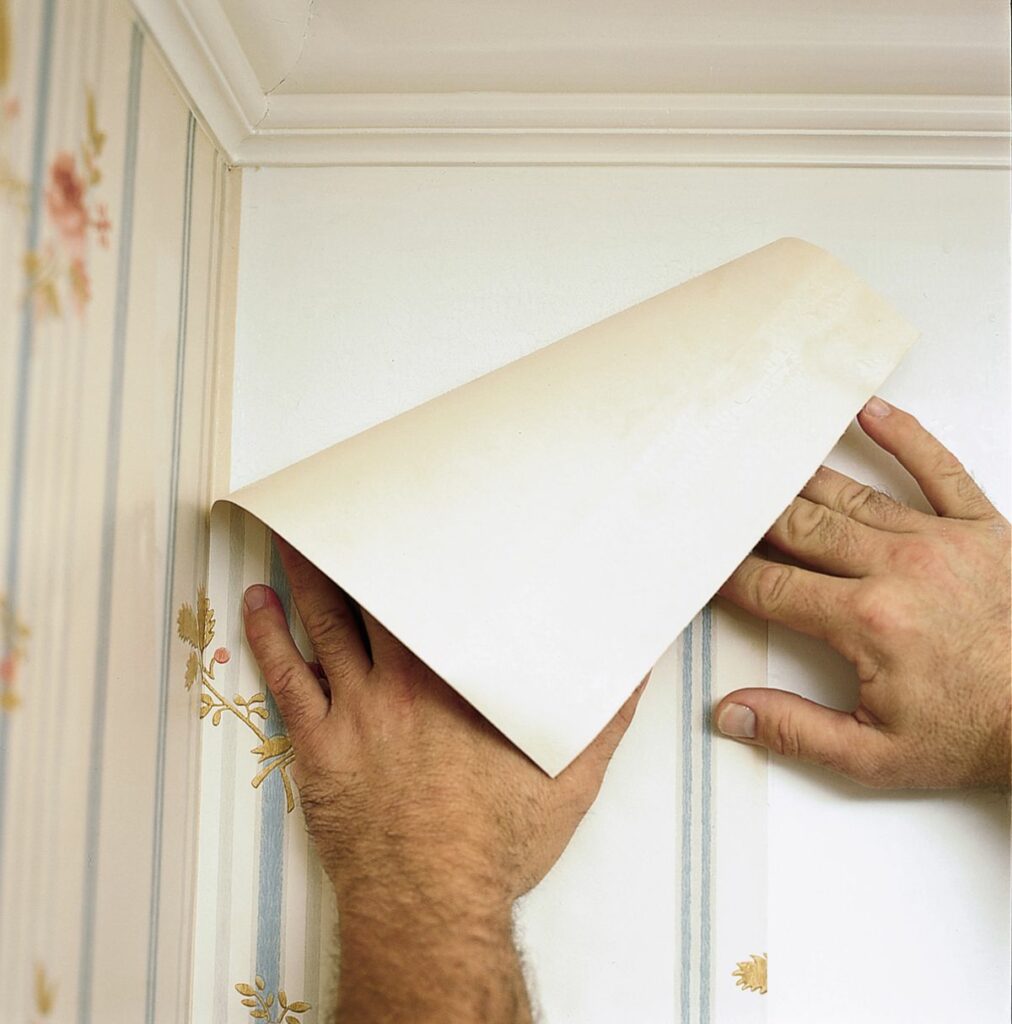
To install the wallpaper, slowly peel away the backing paper, smoothing and securing the wallpaper to the wall as you go. Use your hands or wallpaper smoother to ensure that there are no air bubbles, creases, or bends and to create a flat surface.
If you encounter difficulties, you can lift the wallpaper from the bottom and smooth it out again.
One of the benefits of self-adhesive wallpaper is that it is adjustable and easy to remove, so don’t hesitate to lift and reposition the paper if necessary.
Check out for Air Bubbles

If you come across any stubborn bubbles while installing the wallpaper, use a pin to poke a small hole in the paper and use a wallpaper smoother to press the air out. This should help eliminate the bubble and give you a smooth surface.
Work Around the Windows and Outlets
Allow the paper to overlap as you reach windows, door frames, or outlets while installing the wallpaper. After applying the piece, use a straightedge and utility knife to trim and remove the excess.
Smooth the wallpaper around all sides of the outlet or window, turning off the power for electrical outlets and switch plates.
Carefully use a utility knife to cut away the paper over the opening, remembering that the outlet cover or switch plate will hide most imperfections. You can apply the wallpaper to flat plates for a seamless look if desired.
Hang The Remaining Pieces
With the first piece of wallpaper installed, it’s time to follow the pattern you have created with your cuts and sticky notes.
Using the same method, hang the rest of the full-width pieces of wallpaper. Make sure to follow the order you have designated with your labels to ensure that the pattern is properly aligned.
Measure The Remaining Spaces
You may have a few inches of wall left uncovered by the wallpaper. If you start from the center of the wall, there may be space at each end.
Please measure the width of these remaining areas to determine how much wallpaper you need to cut to cover them.
Cut The Wallpaper to Cover Up The Remaining Space
To cover the remaining areas of the wall, add a few inches to your measurements and cut the wallpaper accordingly.
For example, if you need 4.75 inches of wallpaper, you should cut it at 7 inches to allow for an overhang. This will give you extra material to work with and make it easier to get a clean, seamless finish.
KEEP IN MIND:
Before cutting the wallpaper to fit the remaining areas of the wall, ensure that the straight edge of the paper corresponds with the pattern on the wallpaper. This will ensure that the pattern is aligned properly and that you get a seamless finish. Double-check your measurements and the placement of the straight edge before cutting.
Apply the Final Pieces
To Apply the remaining pieces of peel and stick wallpaper, use the same process as the full-width pieces. Slowly remove the backing paper and smooth the wallpaper out with your hands or the wallpaper smoother.
You may need to use a couple of small pieces to finish the trim on the last row.
The process is the same whether using a full strip or working with smaller cuts. Take time and ensure the wallpaper is aligned properly and smoothly before moving on to the next section.
Trimming at the Baseboard
Once all the wallpaper strips are in place, it’s time to clean up the edges. Use the edge of a wallpaper smoother to press the wallpaper firmly into the joint where the wall meets the baseboard.
Then, use a sharp utility knife or razor blade to cut along the edge at a 90-degree angle carefully.
Remove the excess wallpaper and firmly press the newly cut edge onto the wall. This will give you a clean, finished look.
Trimming the Wall Corners and Ceiling
After trimming the wallpaper along the baseboard, use the same process to trim it along the joints between walls and between the wall and ceiling. This will give you a professional-looking finish and ensure that the wallpaper is properly aligned and smooth.
Complete Applying the Peel and Stick Wallpaper
After applying the peel and stick wallpaper, remember to clean up and decorate your newly transformed wall. Take the time to appreciate your hard work and enjoy your room’s beautiful, elevated look.
Whether you’re proud to show off your new accent wall to friends and family or want to admire it in the privacy of your own home, you can take pride in knowing that you transformed your space from builder-grade to something special.
How to Apply Peel and Stick Wallpaper Summary
- Clean and prepare the wall by mixing water and rubbing alcohol to remove dirt, grime, and grease.
- Determine starting point: choose a straight, vertical line from ceiling to floor or start from the middle of walls are not level or plumb.
- Measure the walls and find a space to lay out wallpaper cuts and patterns.
- Unroll and reverse roll the wallpaper to flatten it out.
- Measure and cut the first piece, leaving a 1.5-2 inch overhang and labeling it with a sticky note.
- Measure and cut the rest of the pieces, making sure the pattern is aligned and labeling them in order.
- Arrange the labeled and ordered wallpaper cuts on the floor.
- Begin installation with the first piece, removing part of the backing and aligning it with the starting line or wall.
- Slowly remove the backing paper and smooth the wallpaper onto the wall, eliminating any air bubbles or creases.
- Install the remaining pieces according to the plan, using the same process.
- Trim the edges of the wallpaper along the baseboard, joints between walls, and between the wall and ceiling.
- Clean up and decorate the newly transformed wall.
How Can I Remove Peel and Stick Wallpapers
If you need to remove peel-and-stick wallpaper, you’re lucky because it is generally easier to remove than traditional wallpaper.
Frequently Asked Questions
My Peel and Stick Wallpapers are Falling off; what Should I do?
If your peel-and-stick wallpaper is falling off, the cause could be a dirty wall or incorrect application. To fix this issue, try pulling back the wallpaper in the peeling area and cleaning the wall with 2/3 isopropyl alcohol and 1/3 water.
Allow the wall to dry completely before attempting to reapply the wallpaper. If it still does not stick, the adhesive may have worn off, and you may need to install a new sheet.
How Long Does Peel and Stick Wallpaper Last?
The lifespan of peel-and-stick wallpaper depends on various factors, including the quality of the wallpaper and how well it is installed and maintained.
Some peel-and-stick wallpaper can last for several years with proper care, while others may start to peel or lose their adhesive properties within a few months.
To extend the life of your peel-and-stick wallpaper, clean the walls before installation and follow the manufacturer’s instructions for installation and care.
Regular maintenance, such as dusting and wiping down the wallpaper with a damp cloth, can also help it last longer.
How Can I Clean My Peel-and-Stick Wallpapers?
It is generally best to use mild dish soap and a small amount of water to clean peel-and-stick wallpaper.
However, it is always advisable to refer to the care instructions provided by the manufacturer of your specific brand of wallpaper before cleaning it.
This will ensure that you are using the appropriate cleaning method and products to preserve the quality and lifespan of the wallpaper.
What Tools Do I Need to Hang Peel And Stick Wallpaper?
Knife, Wallpaper Smoother, Pin, Level, Scissor, Step Stool or Ladder, Tape Measure and Sticky Notes.
Do You Need to Primer Before Peel And Stick Wallpaper?
Applying a primer before hanging wallpaper is important because it helps the paste adhere better to the wall surface.
This is especially useful when working with surfaces difficult to bonds to, such as glass, tile, or paneling, or with porous surfaces like bare drywall, joint compound, or flat paint with a chalky finish.
Using a primer can help ensure that your wallpaper stays in place and looks good for longer.
Conclusion
In conclusion, applying peel-and-stick wallpaper is a relatively simple process that can add a fun and unique touch to any room. It is an affordable and convenient alternative to traditional wallpaper and can be easily removed without damaging the walls. To apply peel-and-stick wallpaper, follow the steps mentioned above.
ALSO CHECK: MODERN HOME DECOR IDEAS


